Showing posts with label frontier bushcraft. Show all posts

Sunday, 19 January 2014

My new job

Hello all, and sorry for the prolonged period of silence, I know it's no excuse at all but I've been pretty busy since the middle of last Spring with my new job. Believe it or not (I'm still unconvinced) I'm now a professional bushcrafter!

Early last year Paul Kirtley of Frontier Bushcraft most generously offered me the opportunity to work with the team at Frontier as an assistant, and I jumped at the offer. My first season was fantastic, having an opportunity to simply get out in the woods with a great team of people and share a little of our collective knowledge and enthusiasm for the subject was amazing. I worked in education for a while when I was in my early 20's, and I really enjoyed it at the time, somehow though I'd forgotten how personally rewarding I found it. At the risk of sounding horribly pretentious, the feeling that I can, in some small way, empower other people is an amazing one, and Bushcraft is a great subject for the purpose. Simply taking a group of people out into the woods and showing them how to pitch a tarp to keep the rain off and make a simple fire to brew up on, and seeing how much a basic understanding of those simple skills does empower people, is a wonderful feeling.

I really never expected to work in education again, and I certainly never expected to make any kind of money out of Bushcraft, but here we are, paid work with a top Bushcraft school, and, as you've probably already guessed, I'm absolutely made up about it.

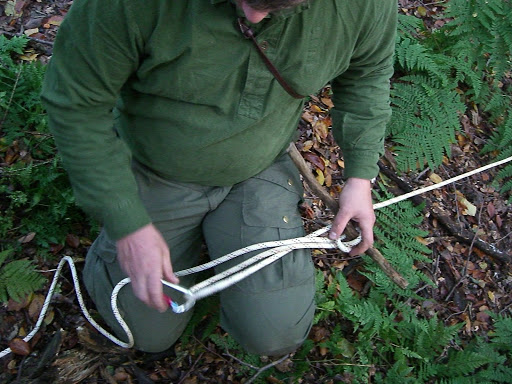
Well chuffed with my new job!
(photo courtesy of Austin Lill)


So, the purpose of this blog was twofold, firstly to explain my prolonged period of silence, and secondly to say thanks to Paul and the team at Frontier for a great start to a new job and a wonderful first season, thank you all for making me so welcome, I feel both honoured and proud to be part of the best bushcraft team around.

All the best,

Stuart.

Sunday, 3 February 2013

Cordage

I've moved a lot of content over to my new blog, this page included. If you want to read my mobile phone article you can find it here

All the best,

Stuart.


Monday, 22 October 2012

BCUK axe and campcraft weekend (Part One)

(Image courtesy of Gary Waidson www.ravenlore.co.uk
Over the second weekend in October this year I was lucky enough to be invited along to a weekend camp organised by Steve "Mesquite" Harrall via the bushcraft uk forum. The camp was held at a private wood in Warwickshire, not too far from Coventry, courtesy of Damian at Woodsman Bushcraft.

As well as organising the logistics of the weekend for us Steve had arranged for Paul Kirtley of Frontier Bushcraft to come and give us some tuition on axe useage and camp craft techniques. This weekend was the first time I'd met Paul, in fact it was the first time I'd received any kind of formal bushcraft tuition at all, but both Paul and his tuition were pleasant surprises.

I've met a few bushcraft instructors over the years at various events and found them generally to be a little lacking as teachers. The instructors I'd met previously generally fall into one of three categories;


  • There's the bushcraft bore, these types take it all way too seriously, they've obviously got a real depth of knowledge and a willingness to pass on that knowledge, they just don't appear to have any tangible personality. 
  • Then there's the bushcraft bully, again these types appear to have quite a good depth of knowledge on the subject but that knowledge seems to have instilled in them a sense of arrogance (these are my least favourite types). 
  • Finally there's the enthusiast, these are great people to be around, wonderful personalities, no sense of arrogance, great sense of humour, but unfortunately no real depth of knowledge or experience, this last type have usually done a course or two and gained some kind of vague qualification but just don't have an enormous deal of knowledge to pass on, I'd more than happily go for a weekend camp with these people, I just wouldn't pay them for the privilege. 


As I said previously, Paul Kirtley was a pleasant surprise, he manages to combine an obvious wealth of knowledge and experience with a great level of enthusiasm for the subject, and a proficient and well considered teaching style with a sense of humour and nicely laid back attitude. In short, he came across as a person first and a bushcraft instructor second, I'd readily recommend Paul and Frontier Bushcraft to anyone looking for some formal tuition in bushcraft. He's also more than capable of staring a piece of string into submission.

(Image courtesy of Chris Leeland)
The main project over the weekend was the construction of greenwood benches. The idea behind the construction of these benches was to demonstrate a variety of green woodworking techniques, but of course there was also the added benefit that we ended up with some nice seating to give back to Damian as a thank you for the use of his woods. The first stage in making the benches was to collect the materials that we'd need. A couple of recently fallen Beech trees (Fagus sylvatica) were selected and Paul offered some instruction in the correct method of removing the side branches as we only needed the main trunk for this project. This process is variously referred to as "limbing" or "snedding", put simply it means tidying up the trunk.

(Image courtesy of Steve "mesquite" Harral)
Once Paul had demonstrated the correct technique it was time for the rest of us to have a go, many hands made very light work of the job and in no time we had a couple of nice clean Beech trunks to work with.

(Image courtesy of Steve "mesquite" Harral)
In these two photo's you can see my mate Pete and I using a Gransfors Bruks Scandinavian forest axe that Paul had kindly provided for us to have a play with. It's a thing of beauty and I think that Pete and I  both fell in love with it straight away, so if anyone's stuck for what to get me for my birthday........here's a link!

(Image courtesy of Steve "mesquite" Harral)

After we'd limbed out our Beech trunks the next step was to divide them up into workable sections, what we were looking for were long straight sections of the trunk with as few knots as possible to make it easier for us to split them down. We started out by using a chainsaw to section up the trunk but modern technology quickly failed us and we had to resort to good old fashioned manpower. Thankfully there were enough of us to get the job done pretty quickly and without it being too much like hard work.

(Image courtesy of Steve "mesquite" Harral)
(Image courtesy of Paul Kirtley www.frontierbuschraft.com)
The next stage in the process was to split our logs in half to start creating the seats of our benches. We accomplished this by first making "gluts", or wooden wedges, out of Holly (Ilex aquifolium) which we could then use, along with an axe, to split the green Beech along the length of it's grain. I'll probably write about making and using gluts at a later date, but for now here's a few images of us and our gluts to give you some idea.

(Image courtesy of Paul Kirtley www.frontierbushcraft.com)
(Image courtesy of Gary Waidson www.ravenlore.co.uk
(Image courtesy of Paul Kirtley www.frontierbushcraft.com)
The gluts did the job quite nicely......

(Image courtesy of Paul Kirtley www.frontierbushcraft.com)
.....and then it was time to smooth the split sides down a little to remove any splinters that may otherwise end up giving someone a nasty surprise when they sat down.

(Image courtesy of Paul Kirtley www.frontierbushcraft.com)
Once we'd worked most of the larger splinters out of the seats of our benches it was time to fit some legs. These were simply pieces of Birch (Betula sp.) that were sawn to length and then fitted into holes that were drilled through the seats of our benches.

(Image courtesy of Paul Kirtley www.frontierbushcraft.com)
All that was left then was knocking in some hardwood wedges to the tops of the legs where they protruded from the seats to tighten everything up and hold the legs firmly in place, for this I used a couple of pieces of well seasoned Birch, other's used the Holly that we'd made the gluts from earlier,....

(Image courtesy of Paul Kirtley www.frontierbushcraft.com)
....and then sawing off the bits of leg that were left protruding from the seats.

(Image courtesy of Paul Kirtley www.frontierbushcraft.com)
Et voila, the finished product


We got up to loads more projects over the weekend but it takes longer to write about them than do them so this little trip report's going to be in a couple of parts, look out for the next one if you enjoyed this first installment.

Bye for now,

Stuart

Tarpology Two

(Image courtesy of Gary Waidson www.ravenlore.co.uk)
During a recent weekend away with some friends from BCUK, Paul Kirtley of Frontier Bushcraft took time out to give us a few hints and tips for setting up larger tarps. These larger types of tarps would most likely get used in a base camp situation, or to provide large sheltered communal areas for groups of people. One of the problems associated with using big tarps is that they can be quite heavy, especially once they get wet, so the methods that get used for setting up lightweight tarps (like this) just aren't up to the job. Heavy tarps call for a lot more load bearing ability on the ridgeline to prevent sagging and to enable the tarp to be set up tautly enough to properly shed rain. To get that load bearing ability two things are needed; a much stronger ridgeline, and a method of tying up that ridgeline that provides more mechanical advantage to provide lots of tension. 

The method that Paul demonstrated is one of the best known, and has been described and illustrated extensively in the past, I just happened to have access to some pretty good photo's of Paul's demonstration so thought I'd share them.

(Image courtesy of Chris Leeland)
The rope that Paul used for this demonstration was 11mm static kernmantel rope, the kind that cavers and tree climbers use a lot, dynamic rope (the kind that rock climbers use) wouldn't be suitable for this method as it's too stretchy. Thinner static rope would be fine, 9mm kernmantel rope has a breaking strain of over 3000kg, even with the mechanical advantage provided by the tensioning system, 3 tonnes+ still takes a lot of breaking. The karabiner is just a standard screw gate type. 

One end of the rope is secured to a tree with a timber hitch. In all honesty this is a method that had never occured to me to use before but it's one that I will be using in the future as it's ideally suited to the purpose. It's really easy to tie, it won't slip under tension, it won't come undone when the tarp's flapping wildly in the wind, it won't swell up and jam when wet, and it's really easy to untie when you come to pack away, it was one of those "why didn't I think of that" moments.

(Image courtesy of Chris Leeland)

The other end of the rope is passed once around another tree and secured and tensioned using a variation of the trucker's hitch. The first stage is to make two bights in the rope, creating an "S" shape, much like tying a sheepshank. Stage two also mirrors the sheepshank; a loop is made in the standing part of the rope and the bight of the "S" nearest to that end is passed through it, being careful to ensure that the loop is twisted in the right direction and that the bight passes through the loop from the correct side. You've now got something resembling half a sheepshank.  Hopefully the images below help to clarify things a little. 

(Image courtesy of Chris Leeland)
A stick is then placed through the bight and the bight is pulled tight against it. Although not strictly necessary this provides a little extra security and helps to ensure that the hitch doesn't collapse under tension.

(Image courtesy of Chris Leeland)
Stage three is to insert a karabiner into the bight that's pointing towards the live end of the rope, the main purpose of the karabiner is that it greatly reduces the friction on the rope whilst it's being tensioned, an added bonus is that, especially when using long ropes, it makes the hitch much simpler to tie.
(Image courtesy of Chris Leeland)

All that's left is to apply tension to the live end of the rope and to tie it off however you see fit. I don't have a photo of the hitch being tied off at the moment, I'll add one as soon as I can.

Bye for now,

Stuart